If you don’t feel like reading, don’t worry! You can watch this as a video!
If the pandemic taught us something it was to become resourceful and creative about our self-care. At-home facial treatments are an easy way of pampering ourselves while improving our skin, and the best of all, it’s easier now than ever! In this blog post, I will guide you through the steps you need to follow if you want to make your facial treatments. So whether you want to lift your emotion or create a space of connection with your children, partner or friends, keep reading because we are about to start!
5 basic steps for at-home facial treatments
Facials are an enjoyable and relaxing experience, however, sometimes you may not be able to schedule an appointment. Luckily, there are still some great options that you can use for your facial at home.
The idea for at-home facials in our minds is probably to go deeper than the everyday facial routine and create this pampering spa day where our emotions are lifted and our skin gets a special glow.
That is why we recommend including these 5 steps to make from your spa day at home an unforgettable and repeatable experience:
- Step 1: get in the mood. Remember that this is not just about taking care of the skin, it is more a self-love ritual
- Step 2: Prepare your face skin. Having a facial at home requires your skin to be clean and ready for all those great ingredients
- Step 3: Bring your devices. You can’t imagine how easy and cheap is to find great spa-level facial devices. I will give you some tips here!
- Step 4: Mask time! I don’t know if you do, but I do love any mask! these can be used for so many purposes but today we will focus on bringing food to the skin
- Step 5: Healthy close. Most facials finish with a great moisturizer and your at-home facial will not be the exception.
Let’s do this!
Step 1: get in the mood
Stress is one of the worst skin enemies. It creates inflammation of our skin cells, diminishing their capacity of absorbing and transporting nutrients and oxygen, degrading our skin health.
So, if you want to enjoy a relaxing spa experience you should start by creating the perfect environment for relaxing yourself and releasing all those emotions that are harmful to your skin and your soul.
Here are some tips to create the perfect environment:

- Play some calming music for a relaxing atmosphere
- Take a deep breath
- Place an intention for the moment, it could be to connect with yourself or with someone special. I love to use the spa day to connect with my daughter for example
- Make an affirmation and repeat it several times
- Light a scented candle or a humidifier with your favorite essential oils
- Prepare the products you will use
Step 2: Prepare your face
Now that you have created the perfect environment, it’s time to prepare our faces for our at-home professional facial. This step involves cleansing and exfoliating the skin. It will help not just to remove dead skin cells but will open our skin pores to receive the amazing nutrients that bring in the products we chose.
What products do I need for this step?
- A hair band or bobby pins to cover up strands and slits in your face
- Your cleansing products should include an oil-based cleanser and a water-based cleanser. In this blog post, I guide you on how to choose the right cleanser for you or your children.
- Your exfoliating products. If you don’t know how to choose the perfect exfoliator for you or your children you can find all the information here.
Double Cleanse
If you have read my earlier posts I promote the double cleansing process which involves:
- Having a good cleanse with an oil-based cleanser to remove excess oil while leaving the lipid barrier intact

- Finish with a facial cleanser or a cleansing lotion formulated with skin’s ph (5.5 to 6).
- In case you don’t use a pH-balanced cleanser, you should be using a toner
- Toner helps equalize the skin pH in case you have used an alkaline product
Exfoliate
This is the best way to finish the cleansing process and remove dead skin cells. In my previous blog, I describe several exfoliating methods however for this facial at home I recommend the use of a clay mask. why?
- It’s easy and effective. A mask made with clay will be a great absorbent and can take away the dirt and excess oils from the skin.
- Preparing a face mask based in clay at home is easy. You only need to activate some clay with water or a watery humectant mix and put it in the face
- When the face mask dries and removed with warm water, a warm washcloth, or a cotton pad, it takes away dead skin cells promoting cellular turnover
If you like to use chemical exfoliants like those based on glycolic acid or lactic acid, this is the time to use it, leave it for 10 minutes and wash. However, I do not recommend chemical exfoliants for the delicate skin of a tween or a teen.
Now that your face is clean you are ready to go!
Step 3: Bring your devices
What are devices for?
Clogged pores in the «T Zone» are very common. This is the part of our face that secretes the most sebum (especially in oily skin), which is why the pores tend to clog. That is why we want to use extra help to remove blackheads by bringing spa-quality facial devices.
We are using two different devices that you can easily find in Amazon for less than USD$20:
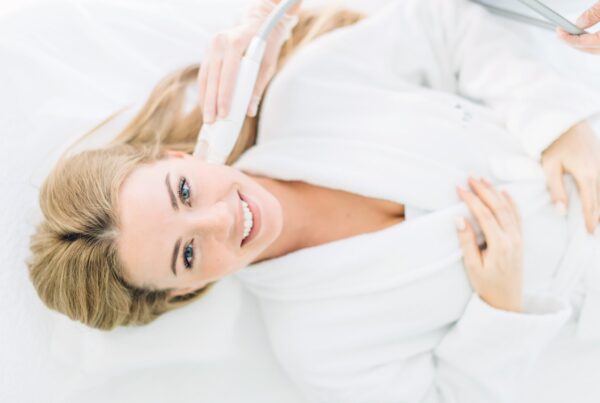
Facial Steamer
Your DIY facial will not be complete without your facial steamer. It condenses water or a watery moisturizer and turns it into steam which opens up the pores making it easier to bring sebum or impurities to the skin’s surface.
You just need to expose your face to the steamer for 10 to 15 minutes and your skin will be ready for the next device.

Blackhead remover
This device uses a mild suction to remove clogged pores and blackheads caused by the build up of sebum, dirt, and dead cells. To use it, you only need to position the device directly in the «T Zone», your nose for example, and slide it slowly over the «T Zone» for a few seconds. You can repeat it two or three times.

Step 4: It's Mask time
Now that your pores are slightly open, it’s time to bring amazing active ingredients that become food to the skin, that make it look fresh and healthy. A hydrating face mask is a great ally for this purpose.
Replenish Hydration with a Face mask
There are several types of masks, however, the sheet mask is one of my favorites. This is submerged in a mixture with moisturizing properties and once it’s soaked, you place it on your skin for at least 15 minutes. You can expose your face to the facial steamer while using it to help the ingredients penetrate better.
Important: It is not necessary to wash your face after your mask. Just remove the sheet and leave your skin dry before getting to your final step.

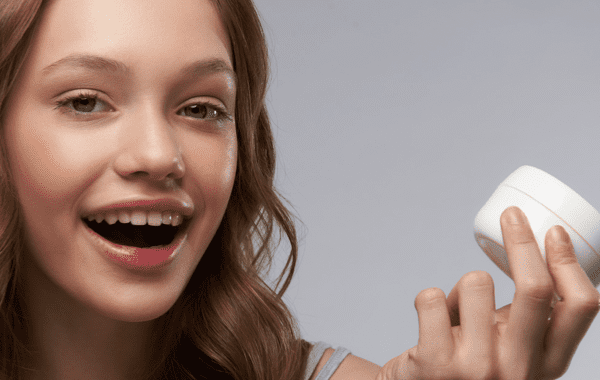
Step 5: Healthy closure
Your final step to leave your skin with a radiant glow involves the use of a moisturizer. In this blog, you can find everything about what a moisturizer is and how to choose them, but here I leave you some tips:
- If you are doing your ritual in the daytime, close your routine with a Vitamin C Serum. It will protect you in case you expose to sun
- Moisturizers can vary according to skin type. Make sure you have chosen the right one (don’t forget to check on my previous blog)
- Apply your moisturizer while performing a facial massage in circular motions or use a jade roller instead
So there you have it! five easy steps to giving yourself a facial that will make you feel pampered, relaxed, and connected with yourself and your loved ones! These steps are not only affordable but simple enough for anyone to follow. If you’re looking for an excuse to take some time for yourself, why not try one of these facials? And don’t forget to share this blog with your friends – we all need a little bit of self-care in our lives!

Subscribe to Our Blog!
About Me

Beatriz Morales
If you don’t feel like reading, don’t worry! You can watch this as a video!
If the pandemic taught us something it was to become resourceful and creative about our self-care. At-home facial treatments are an easy way of pampering ourselves while improving our skin, and the best of all, it’s easier now than ever! In this blog post, I will guide you through the steps you need to follow if you want to make your facial treatments. So whether you want to lift your emotion or create a space of connection with your children, partner or friends, keep reading because we are about to start!
5 basic steps for at-home facial treatments
Facials are an enjoyable and relaxing experience, however, sometimes you may not be able to schedule an appointment. Luckily, there are still some great options that you can use for your facial at home.
The idea for at-home facials in our minds is probably to go deeper than the everyday facial routine and create this pampering spa day where our emotions are lifted and our skin gets a special glow.
That is why we recommend including these 5 steps to make from your spa day at home an unforgettable and repeatable experience:
- Step 1: get in the mood. Remember that this is not just about taking care of the skin, it is more a self-love ritual
- Step 2: Prepare your face skin. Having a facial at home requires your skin to be clean and ready for all those great ingredients
- Step 3: Bring your devices. You can’t imagine how easy and cheap is to find great spa-level facial devices. I will give you some tips here!
- Step 4: Mask time! I don’t know if you do, but I do love any mask! these can be used for so many purposes but today we will focus on bringing food to the skin
- Step 5: Healthy close. Most facials finish with a great moisturizer and your at-home facial will not be the exception.
Let’s do this!
Step 1: get in the mood
Stress is one of the worst skin enemies. It creates inflammation of our skin cells, diminishing their capacity of absorbing and transporting nutrients and oxygen, degrading our skin health.
So, if you want to enjoy a relaxing spa experience you should start by creating the perfect environment for relaxing yourself and releasing all those emotions that are harmful to your skin and your soul.
Here are some tips to create the perfect environment:
- Play some calming music for a relaxing atmosphere
- Take a deep breath
- Place an intention for the moment, it could be to connect with yourself or with someone special. I love to use the spa day to connect with my daughter for example
- Make an affirmation and repeat it several times
- Light a scented candle or a humidifier with your favorite essential oils
- Prepare the products you will use
Step 2: Prepare your face
Now that you have created the perfect environment, it’s time to prepare our faces for our at-home professional facial. This step involves cleansing and exfoliating the skin. It will help not just to remove dead skin cells but will open our skin pores to receive the amazing nutrients that bring in the products we chose.
What products do I need for this step?
- A hair band or bobby pins to cover up strands and slits in your face
- Your cleansing products should include an oil-based cleanser and a water-based cleanser. In this blog post, I guide you on how to choose the right cleanser for you or your children.
- Your exfoliating products. If you don’t know how to choose the perfect exfoliator for you or your children you can find all the information here.
Double Cleanse
If you have read my earlier posts I promote the double cleansing process which involves:
- Having a good cleanse with an oil-based cleanser to remove excess oil while leaving the lipid barrier intact
- Finish with a facial cleanser or a cleansing lotion formulated with skin’s ph (5.5 to 6).
- In case you don’t use a pH-balanced cleanser, you should be using a toner
- Toner helps equalize the skin pH in case you have used an alkaline product
Exfoliate
This is the best way to finish the cleansing process and remove dead skin cells. In my previous blog, I describe several exfoliating methods however for this facial at home I recommend the use of a clay mask. why?
- It’s easy and effective. A mask made with clay will be a great absorbent and can take away the dirt and excess oils from the skin.
- Preparing a face mask based in clay at home is easy. You only need to activate some clay with water or a watery humectant mix and put it in the face
- When the face mask dries and removed with warm water, a warm washcloth, or a cotton pad, it takes away dead skin cells promoting cellular turnover
If you like to use chemical exfoliants like those based on glycolic acid or lactic acid, this is the time to use it, leave it for 10 minutes and wash. However, I do not recommend chemical exfoliants for the delicate skin of a tween or a teen.
Now that your face is clean you are ready to go!
Step 3: Bring your devices
What are devices for?
Clogged pores in the «T Zone» are very common. This is the part of our face that secretes the most sebum (especially in oily skin), which is why the pores tend to clog. That is why we want to use extra help to remove blackheads by bringing spa-quality facial devices.
We are using two different devices that you can easily find in Amazon for less than USD$20:
Facial Steamer
Your DIY facial will not be complete without your facial steamer. It condenses water or a watery moisturizer and turns it into steam which opens up the pores making it easier to bring sebum or impurities to the skin’s surface.
You just need to expose your face to the steamer for 10 to 15 minutes and your skin will be ready for the next device.
Blackhead remover
This device uses a mild suction to remove clogged pores and blackheads caused by the build up of sebum, dirt, and dead cells. To use it, you only need to position the device directly in the «T Zone», your nose for example, and slide it slowly over the «T Zone» for a few seconds. You can repeat it two or three times.
Step 4: It's Mask time
Now that your pores are slightly open, it’s time to bring amazing active ingredients that become food to the skin, that make it look fresh and healthy. A hydrating face mask is a great ally for this purpose.
Replenish Hydration with a Face mask
There are several types of masks, however, the sheet mask is one of my favorites. This is submerged in a mixture with moisturizing properties and once it’s soaked, you place it on your skin for at least 15 minutes. You can expose your face to the facial steamer while using it to help the ingredients penetrate better.
Important: It is not necessary to wash your face after your mask. Just remove the sheet and leave your skin dry before getting to your final step.
Step 5: Healthy closure
Your final step to leave your skin with a radiant glow involves the use of a moisturizer. In this blog, you can find everything about what a moisturizer is and how to choose them, but here I leave you some tips:
- If you are doing your ritual in the daytime, close your routine with a Vitamin C Serum. It will protect you in case you expose to sun
- Moisturizers can vary according to skin type. Make sure you have chosen the right one (don’t forget to check on my previous blog)
- Apply your moisturizer while performing a facial massage in circular motions or use a jade roller instead
So there you have it! five easy steps to giving yourself a facial that will make you feel pampered, relaxed, and connected with yourself and your loved ones! These steps are not only affordable but simple enough for anyone to follow. If you’re looking for an excuse to take some time for yourself, why not try one of these facials? And don’t forget to share this blog with your friends – we all need a little bit of self-care in our lives!
Subscribe to Our Blog!
About Me